What Causes Microgreen Mold?
The most common reasons for mold growth on microgreens are excessive watering or moisture, high humidity, poor air circulation, contaminated seeds, contaminated growing medium, and contaminated equipment.
So let’s dive in and discuss what causes mold to grow, how to identify it, and most importantly, how to prevent it from forming on your microgreens.
What Is Microgreen Mold?
Before we talk about what causes microgreen mold, we first need to understand what mold is and what it isn’t. People often mistakenly use the word mold and fungus interchangeably, although they’re related – mold is a fungus type (plural fungi).
Fungi are a type of microscopic organism that’s present all around us, even in the very air you’re breathing. It’s neither animal nor plant nor a type of bacteria. It’s an organism with its very own kingdom of classification called Fungi.
A recent estimate suggests that as many as 5.1 million fungal species exist in the world. They include molds, mildews, yeasts, rusts, smuts, and mushrooms.
So what is mold? As I mentioned above, molds are a type of fungus. It has become a common word used widely to describe all types of mold, and it’s no wonder considering there are over 100,000 mold species!
These small organisms can be white, black, blue, yellow, orange, green, or purple and live everywhere. Molds need moisture to thrive, and they reproduce through microscopic spores that fly through the air. When they land on a moist spot, they can start to grow and spread.
Here’s a wicked timelapse showing various fungi developing, specifically Aspergillus niger, Rhizopus, Aspergillus oryzae, and Penicillium.

How To Identify Microgreen Mold
Due to the overwhelming number of mold species, it’s sometimes hard to tell what fungi or mold has spread to your microgreens.
One of the most common microgreen molds we see is white mold. White mold is actually not a type of mold at all – it’s just a catch-all phrase. A lot of mold species will appear white during their early development.
The most common species of molds found in homes are Cladosporium, Penicillium, and Aspergillus. All of them may appear white, gray, black, green, or other various tints.
Now you don’t have to memorize all the scientific names of all these molds and fungi. But you do need to know what to look for when searching for mold. In case you do have mold growing on your microgreens, this is what to check for.
Examples And Symptoms of Fungi and Mold
Check out these mold examples and the important signs to watch for.
Seedlings Fail To Emerge or Grow
Some seedlings will emerge but most will not, which will result in sporadic growth. The growth will be slow and eventually, the resilient seedlings that did manage to sprout will succumb to the fungi infection, fall over and die.
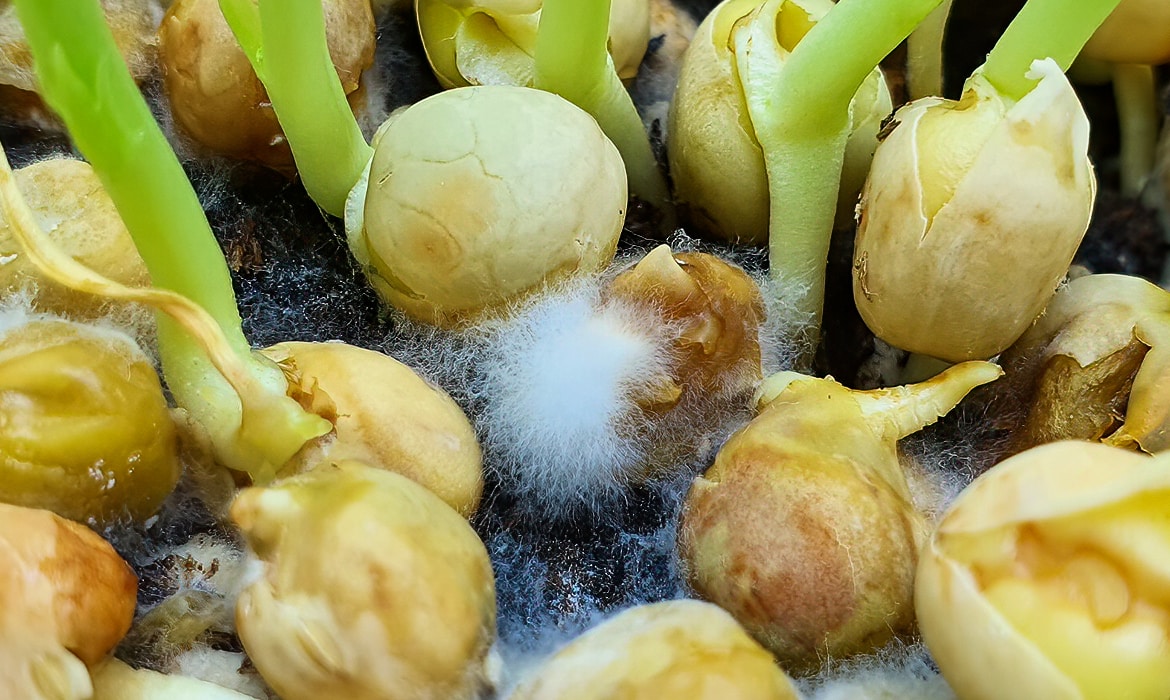
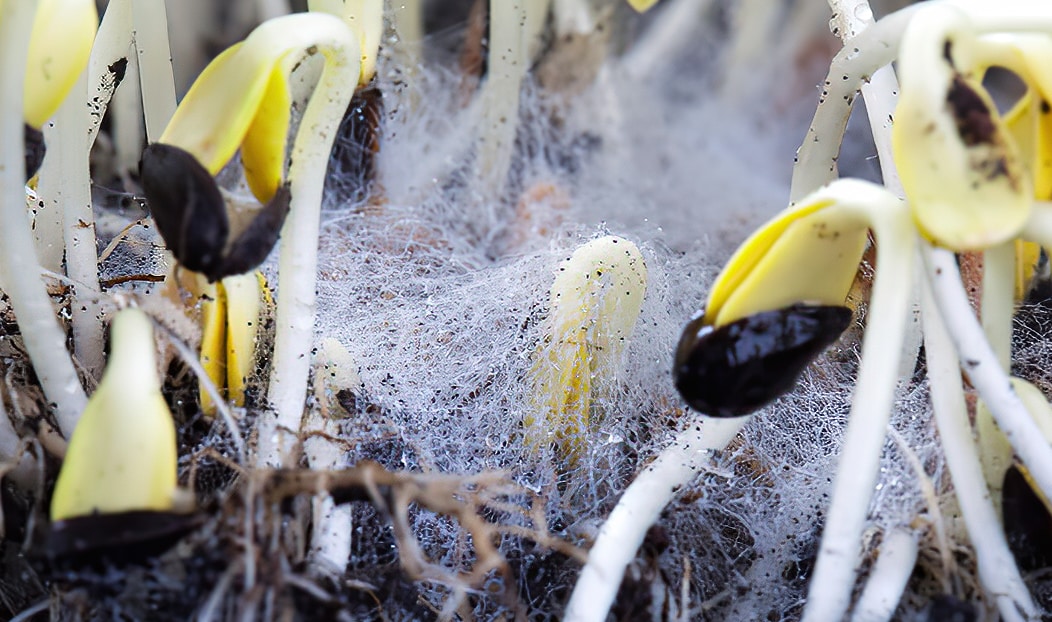
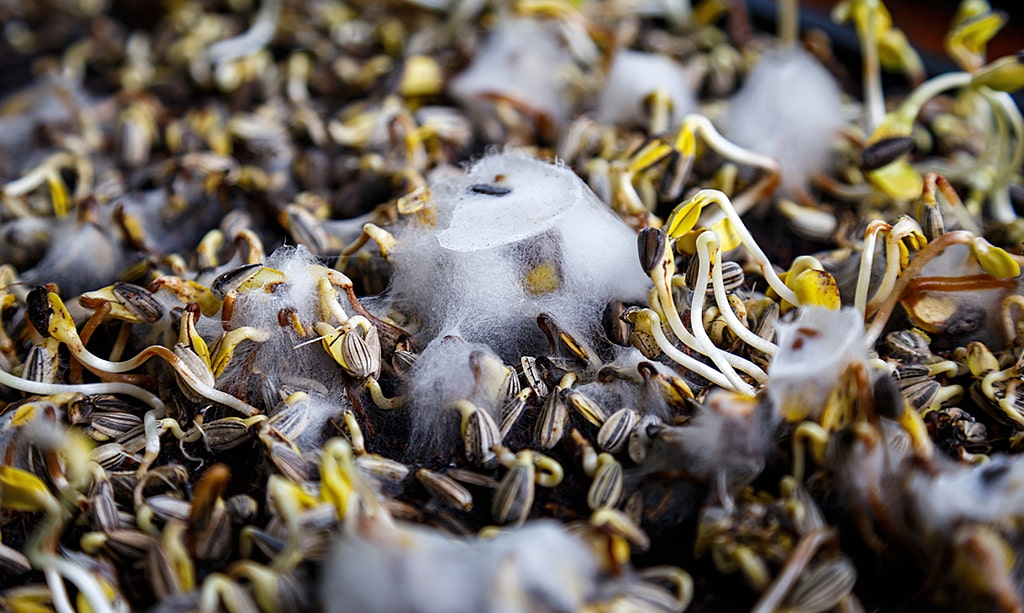
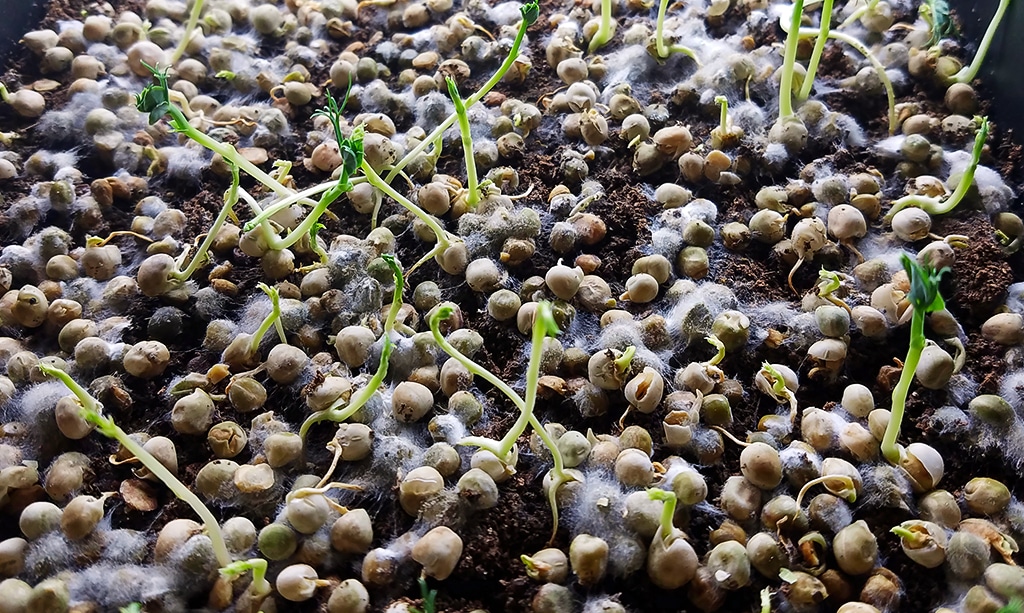
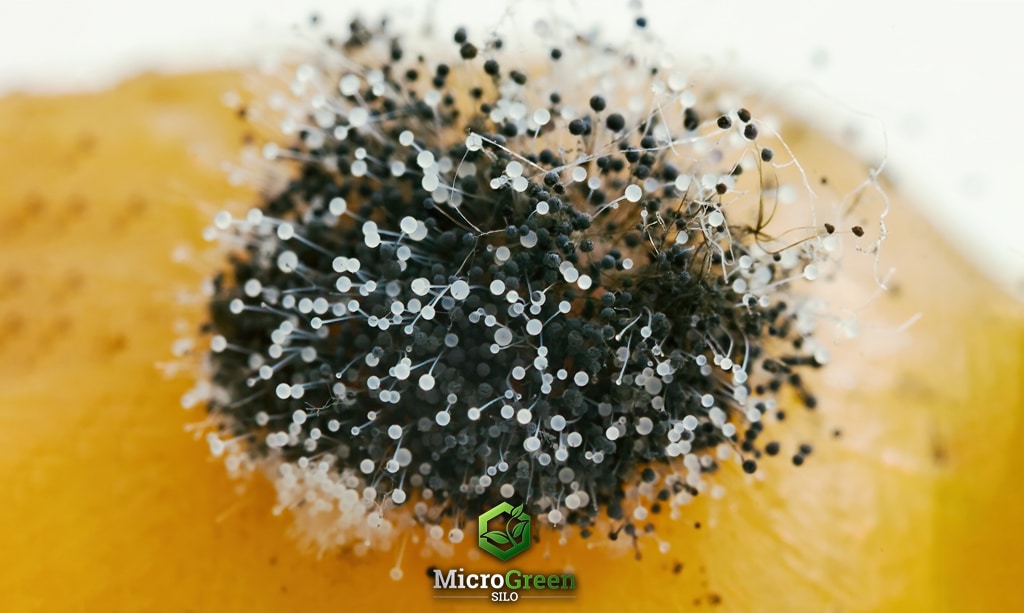
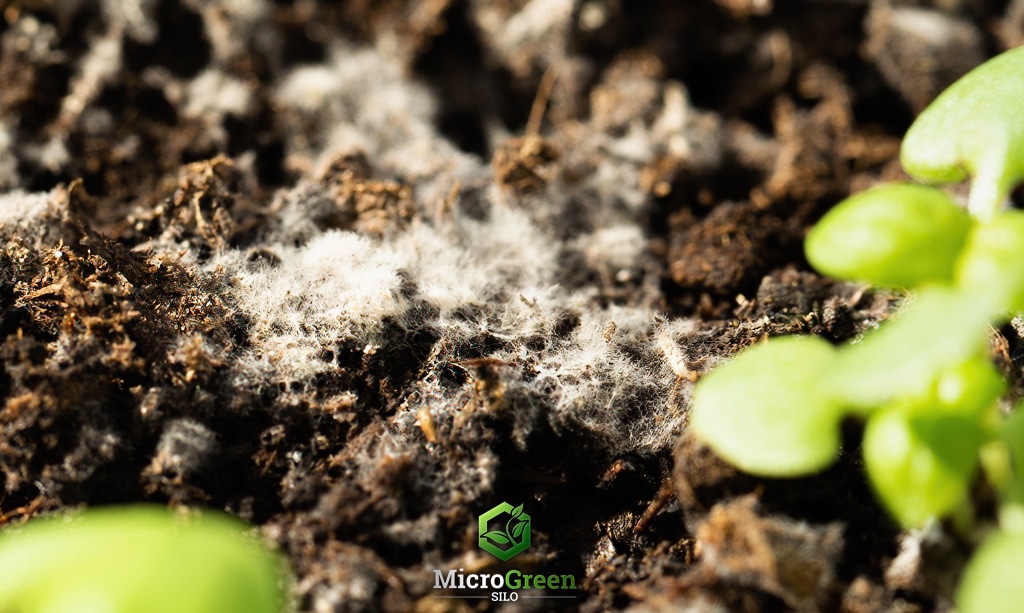
Visible Mold Growth On The Seeds
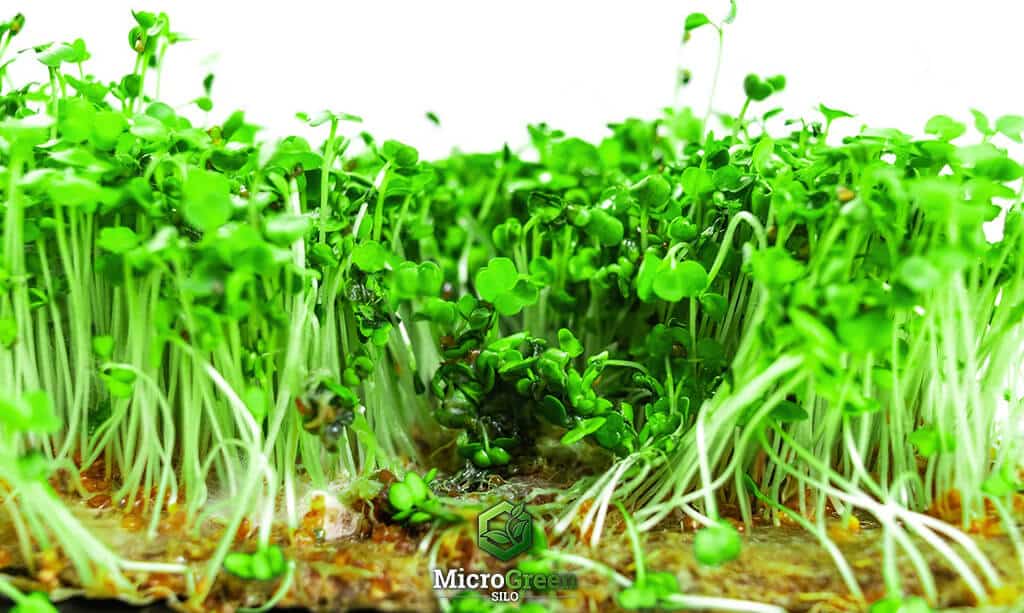
You may notice fungi that are visible on the seeds, seedlings, or grow medium, resembling spiderwebs or fluffy white cotton balls.
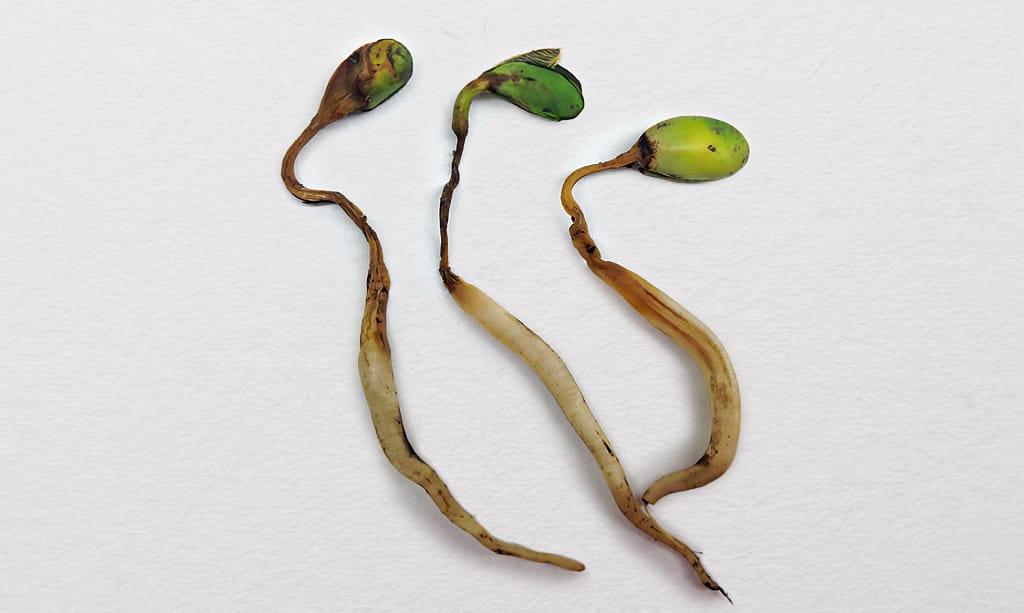
Cotyledons Soft, Mushy And Discolored
The initial leaves of the embryo, known as cotyledons, have a soft and mushy texture. They may also appear water-soaked and discolored, often with dark spots.
Seedling Stems Thin, Pinched At The Center

The seedling stems are discolored, thin/pinched, and appear water-soaked. Maybe falling over due to thin strand-like stems where the seedlings are infected.
Rotting Seedling Stems
The young seedlings’ stems may show discoloration and rot either above or below the growing medium.
Cotyledons Drooping Or Wilting
Cotyledons will droop down and wilt. The leaves may turn brown or greenish-gray in color.
Stunned Or Absent Roots
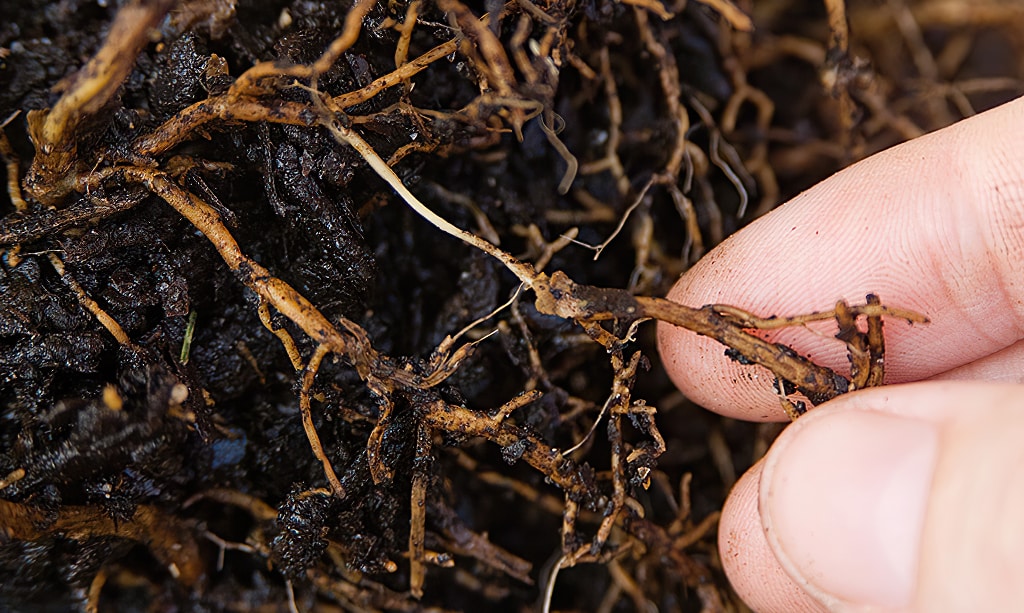
When you touch the roots, they will feel mushy or slimy, and they might be stunned or missing altogether. You might also notice that they look brown with dark black spots, which could indicating root rot.
Bad Or Foul Smell Coming From The Microgreens
If you happen to detect an unpleasant odor coming from the moldy tray, it’s likely due to the lack of proper airflow and the combination of high moisture, resulting in an anaerobic environment that produces a sulfur or rotten egg smell.
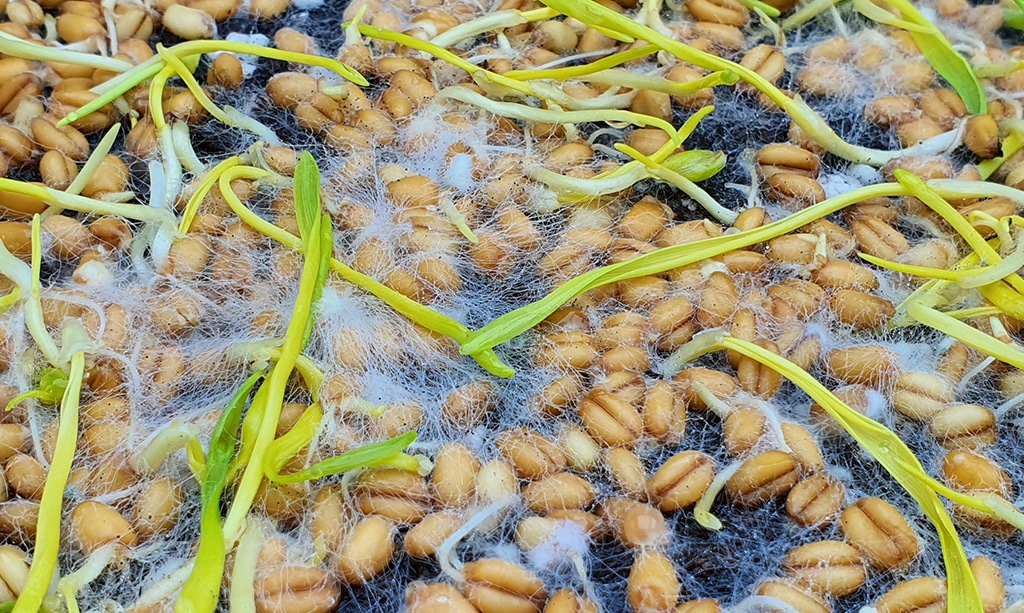
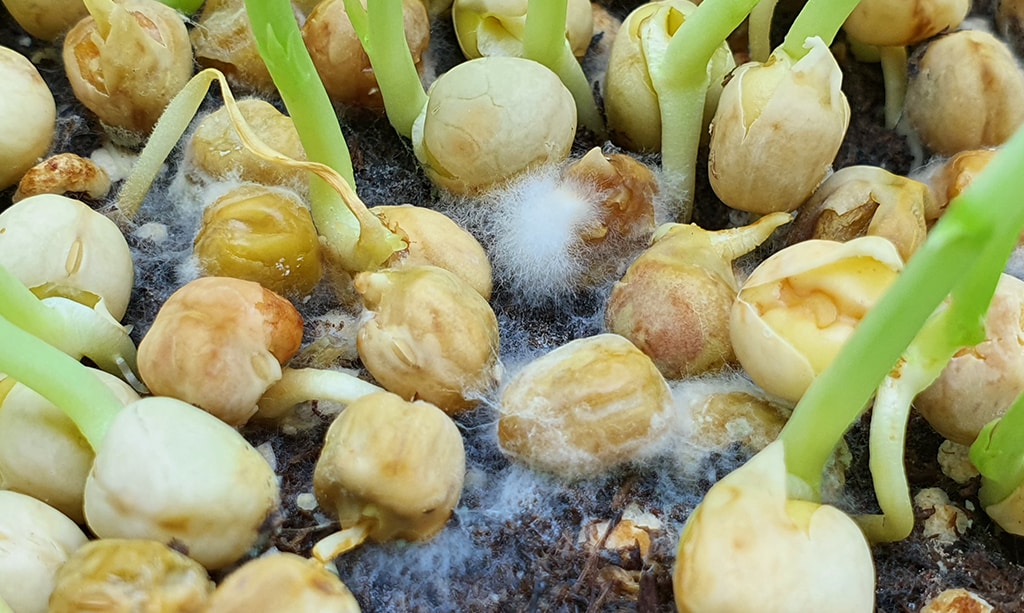
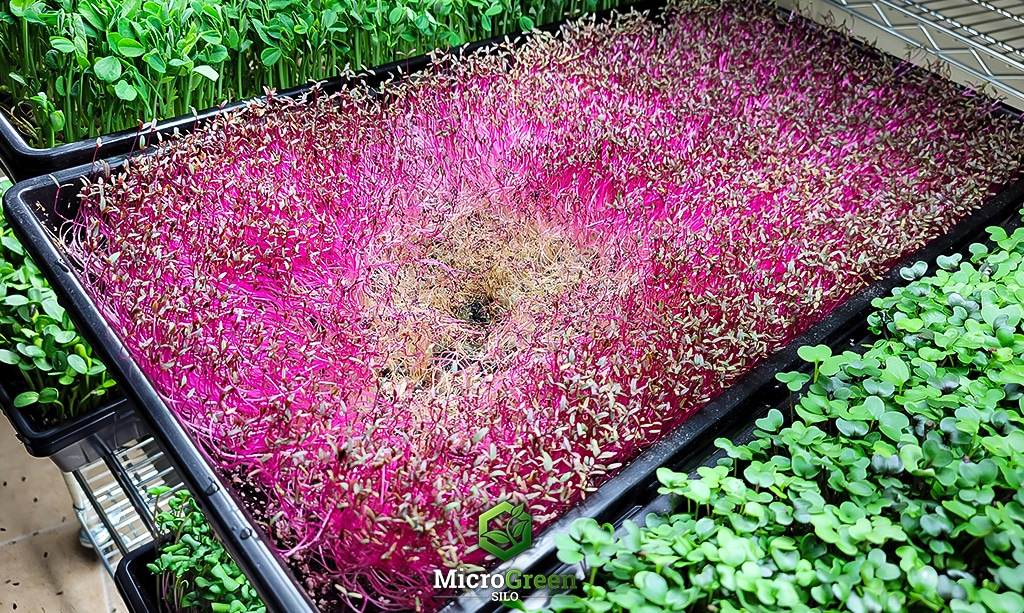
Dead Spots Or Holes Appear
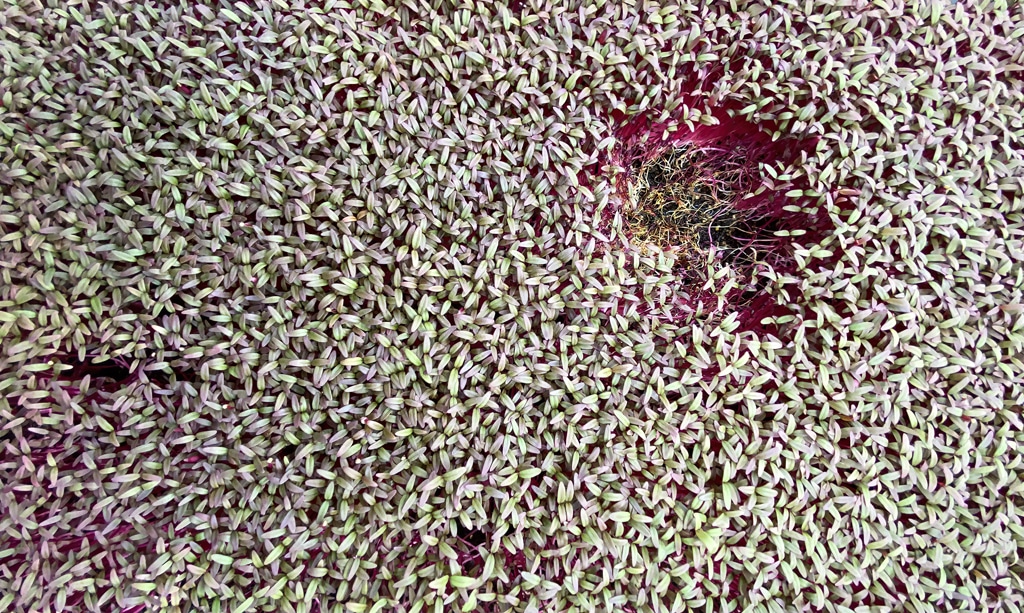
Some microgreens may display a hole resembling a crop circle, while others remain unharmed. Over time, this hole will expand and eventually impact the entire crop.
Seedlings Discolored, Soft And Rotting
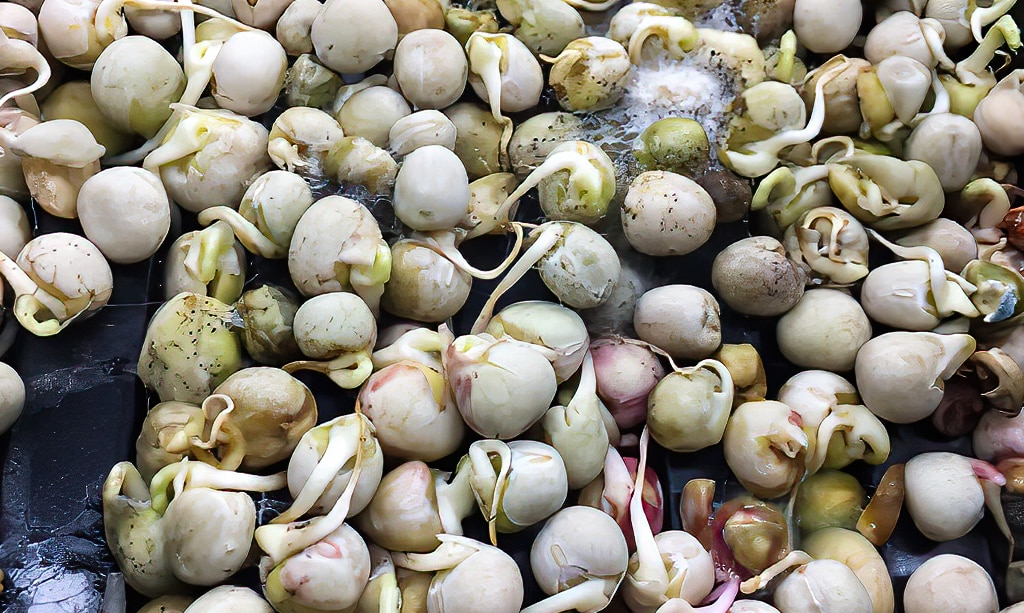
Seeds undergo rotting and become soft and mushy to the touch before the stem and cotyledons emerge. This process is typically accompanied by an unpleasant sulfur odor.
Key Things To Look For
- Seedlings fail to emerge or grow
- Visible mold white, gray growth on seeds
- Cotyledons soft, mushy, and discolored
- Seedling stems thin and pinched
- Rotting stems
- Cotyledons wilting
- Stunted or absent roots
- Bad or foul odor
- Crop circle-like hole appears
- Seeds discolored, soft, and rotting
- Slimy to the touch
- White fuzz wont disappear when sprayed with water
- Black, brown, purple, blue spots on leaves
Now that you’ve got a grasp on microgreen mold and fungi and know what signs to watch out for, let’s dive into another pesky problem: damping off!
Damping-Off in Microgreens
Damping-off is a common problem in microgreens, often leading to significant crop loss. This section will explain what it is, and how to prevent it.
What is Damping-Off?
Damping-off is a fungal disease that attacks the seedlings at their base. It’s caused by various soil-borne pathogens such as Pythium, Fusarium, and Rhizoctonia species, and can be devastating for young microgreens.
How to Identify Damping-Off
- Collapsed Seedlings: The most noticeable sign is seedlings falling over or appearing flattened, the collapsed seedlings looks like crop circles.
- Discolored Stems: Look for stems that are darkened or have a mushy texture near the soil line.
- Stunted Growth: Affected seedlings often show poor growth or fail to emerge entirely.
Preventing Damping-Off
- Good Air Circulation: Ensure your growing area has adequate airflow.
- Control Moisture: Avoid overwatering and ensure your soil has good drainage.
- Clean Growing Medium: Use sterilized soil or growing medium to reduce pathogen presence.
By understanding and identifying damping-off early, you can take steps to prevent this disease and protect your microgreens.
Difference Between Microgreen Mold & Root Hairs
Before you can understand the difference between microgreen mold and root hairs, you first need to know what root hairs are and what they’re not.
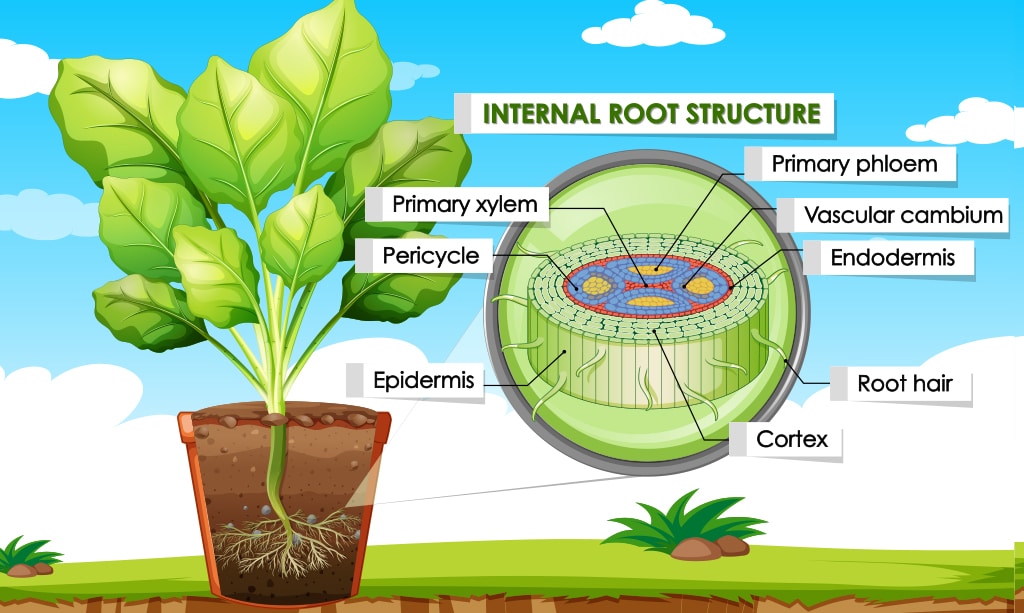
First of all root hairs are not hairs, they do somewhat resemble hairs, but they’re not actually hairs like the ones you have growing on your head.
The scientific term for root hairs is transvacuolar strands or TVS for short. Root hair diameter can range anywhere from 10 µm (micrometer) to 5mm or more in size and length.
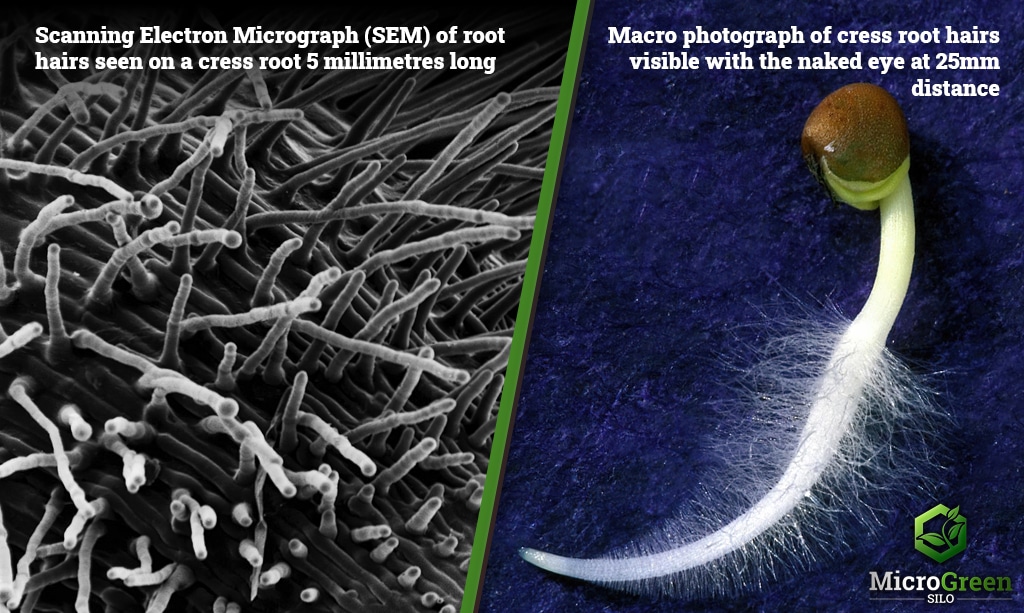
Root hairs significantly increase the root surface area and the root diameter. It’s believed their purpose is to aid plants in anchorage, nutrient acquisition, and microbe interaction (Grierson, 2002).
So what’s the difference between root hairs and microgreen mold? Root hairs are tiny bright white elongated tubular extensions of an epidermal cell of a root. Molds, however, are a diverse number of fungal species that grow in multicellular structures called hyphae.
What Is The Spray Test For Microgreens?
Most beginner microgreen growers get root hairs confused with mycelium growth and panic! Fear not! There’s a simple technique called the spray test that instantly confirm if it’s root hairs or fungi.
Grab a spray bottle with a fine mist nozzle, gently mist the roots with water, and if the root hairs disappear, congratulations, you just confirmed that they’re root hairs. However, if you spray mycelium with water, it will not retract or disappear!
Here’s a short video showing how Sango Radish root hairs collapse when they’re sprayed with water. If this indeed was mold it would not be affected by the water and the mold structure would be unaffected.
So keep that in mind next time you see the little fuzzy growth on your crop. Eventually, you will be able to just eyeball it without spraying because you’re going to be a boss at growing microgreens!
What Causes Microgreen Mold
As we have discussed, fungi and mold require moist, dark anaerobic environments to thrive. Unfortunately, creating those perfect conditions is all too easy while growing microgreens indoors. Let’s talk about them in more detail to better understand how to prevent them.
Excessive Moisture & Overwatering
Fungi love and require water. They absorb any and all extra water in a microgreen tray to survive and spread. As microgreen trays are shallow it’s all too easy to overdo it when it comes to watering your crops.
Poor Air Circulation
As microgreens are grown indoors, they need good air circulation. Microgreens are more susceptible to fungi as they’re grown on cramped shelves. Without good air circulation to help them dry between watering they provide the perfect breeding ground for fungi.
High Humidity
High humidity can worsen microgreen mold problems. If not controlled correctly will lead to widespread fungal or bacterial problems.
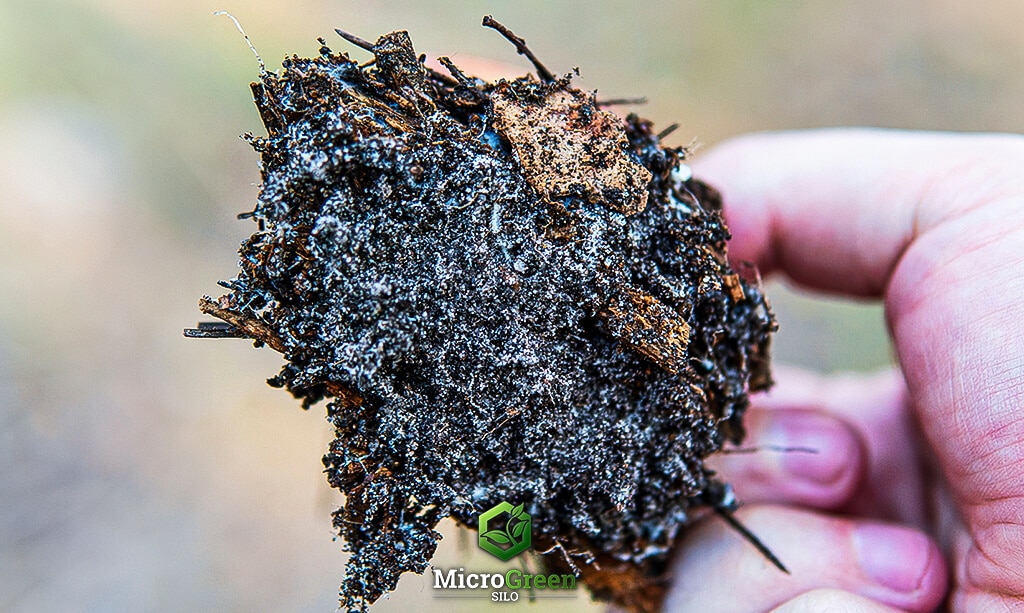
Contaminated Soil & Equipment
It’s all too easy to overlook your growing medium and equipment. Your growing medium itself can be the root cause of fungal problems. While your growing medium may have good microorganisms, it can become contaminated before it lands in your tray.
Poor Drainage
Poor water drainage can lead to excess moisture and humidity, allowing microgreen mold and fungi to grow and thrive. Poor water drainage can be caused by a lack of drainage holes, dense-growing medium, and deep microgreen trays.
How To Prevent Microgreen Mold
Fungi and mold problems are unavoidable, but there are proven strategies to stop them from forming on your microgreens, so let’s get started and discuss how to prevent mold on microgreens.
Control Moisture & Avoid Over-watering
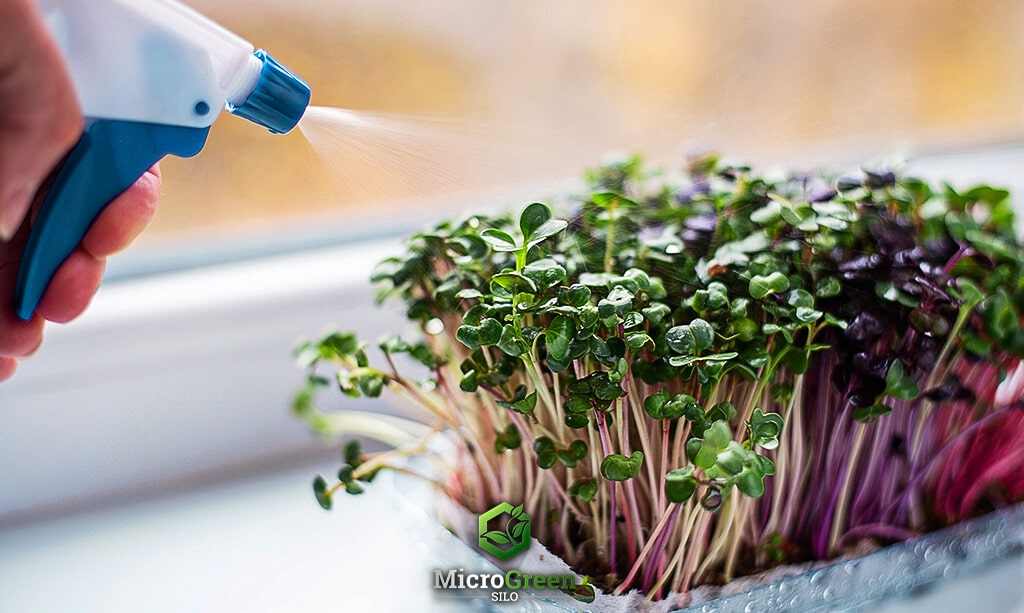
Controlling moisture and avoiding overwatering is the most important step when growing microgreens. During the germination stage, you only need to lightly spray the seeds with water until the seed pushes out its radical.
Once the radical reaches the bottom tray you immediately switch to watering from the bottom only by adding a cup of water to the bottom tray every 12-13 hours.
Improve Air Circulation
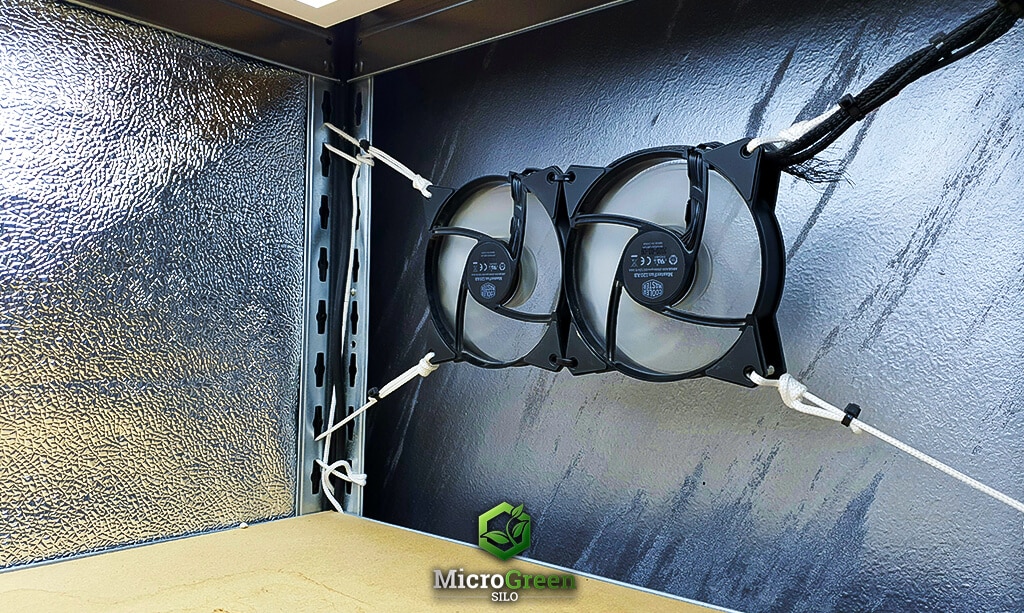
All plants need air circulation, otherwise, fungi will quickly start to develop and wreak havoc. Improving air circulation can be achieved by adding more fans to the grow rack, adding auxiliary fans to the grow room, or simply cracking a nearby window to allow some fresh air into the room.
Control Relative Humidity
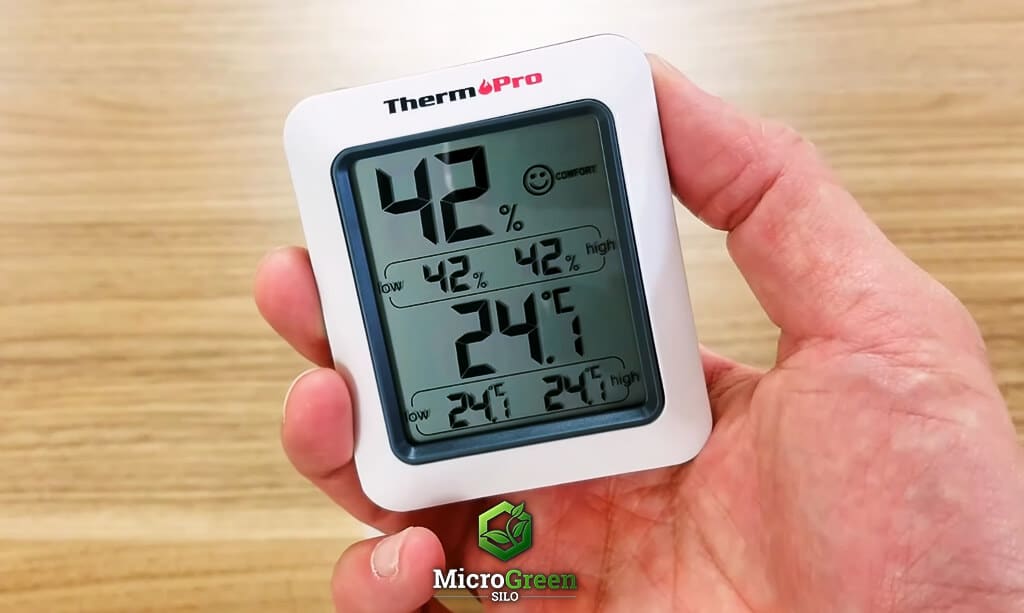
To effectively control humidity in your grow room it’s important to have an understanding of the relative humidity levels inside your grow room. You can do this by investing in a digital hygrometer, which provides accurate readings.
I use and recommend the ThermoPro TP50 Digital Hygrometer because it quickly detects sudden changes in humidity making it ideal for environments with fluctuating moisture levels.
With its high accuracy and fast refresh rate, it provides up to date readings with precision of ±2–3%RH and ±1°F. Additionally, this device keeps track of the highest and lowest recorded levels, ensuring a healthier indoor grow environment. It includes a tabletop stand, magnetic back and the option to switch between °F and °C.
Controlling humidity in the grow room is easier than most people think! The cheapest method is to open up a nearby window and allow fresh air inside the grow room.
Alternatively, if you have no windows you can purchase a cheap dehumidifier to help when the humidity of the room gets above 70% RH.
Sterilize Equipment & Medium
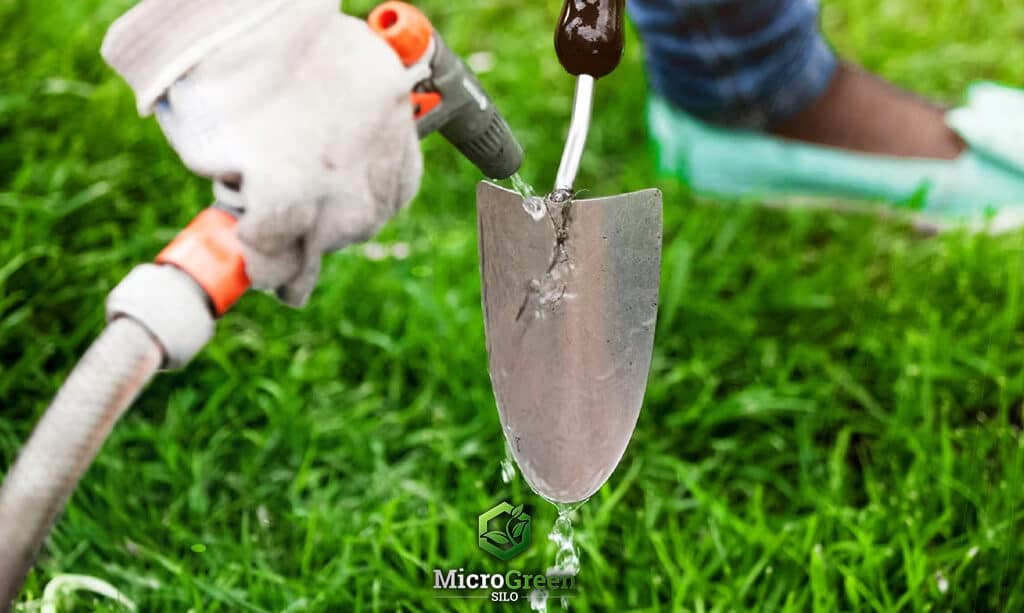
Most new microgreen growers ignore this step, which can cost you a lot of time and money if left unchecked. After using any equipment that comes into contact with your grow medium you need to wash and clean it.
These include your grow trays, gardening trowel, gardening fork, knives, scissors, shovels, buckets, wheelbarrows, etc. If you never clean your equipment you could be inadvertently transferring fungi from one area to the next.
Improve Drainage
Make sure you have trays with enough drainage holes. If your inner tray that holds your grow medium only has a few holes you may be setting yourself up for a disaster.
I personally recommend Bootstrap Farmers 1020 Extra Strength Trays that have a mesh bottom, these trays will last you a life time, they even come in different colors!
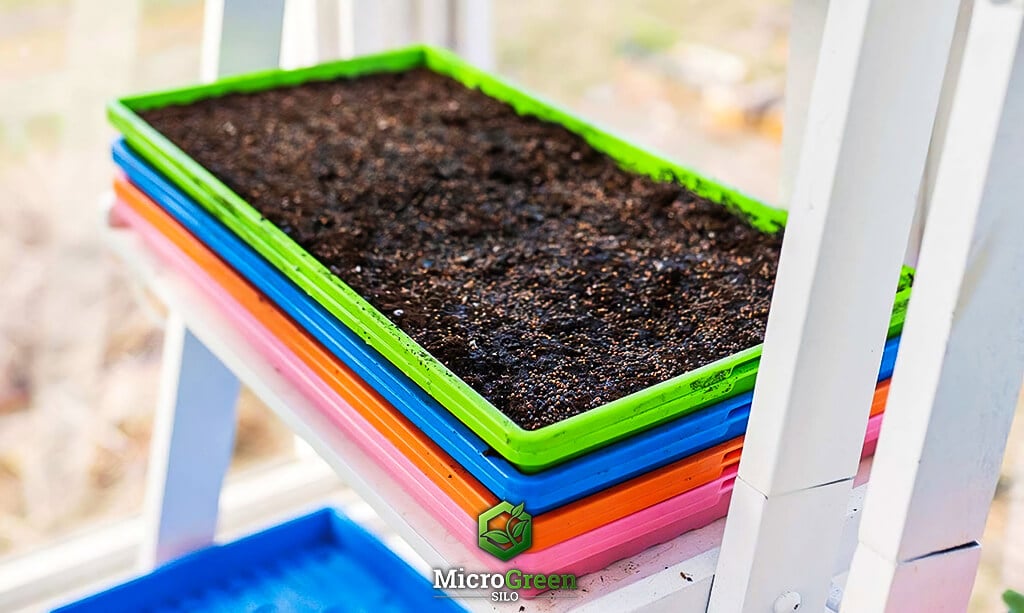
If you already own trays that have a few holes you can always grab a drill and drill some additional holes to improve drainage.
Control Grow Room Temperature
Maintaining the appropriate moisture levels and temperature range is crucial for cultivating healthy microgreens. For optimal growth, a thermometer is a must-have tool. The TP50 Hygrometer/Thermometer is a great solution, it keeps track of both temperature and relative humidity.
The ideal temperature range for microgreens is between 22-25°C (71-77°F). If your growing area tends to be cooler than this range, using a heater to raise the room temperature to the appropriate level is recommended.
If your grow room tends to be warmer, using an air conditioner can help regulate the temperature and maintain a balanced environment.
By monitoring and adjusting the temperature as needed, you are providing your microgreens with a comfortable environment for them to thrive and produce excellent results.
Remove & Dispose of Infected Crop
It is crucial to address the presence of mold and fungi on microgreens to maintain a healthy and thriving crop. When you find a tray affected by fungal growth, it’s critical to take prompt and effective action to prevent further contamination. One of the primary steps you should take is immediately to remove and dispose of the infected crop.
While folks may suggest trying to salvage the affected tray using remedies like hydrogen peroxide or various anti-fungal sprays, you should consider whether investing time and effort into this approach is worth it.
When faced with a fungal infestation, prioritizing the well-being of your entire microgreens setup becomes crucial. Instead of trying to salvage a compromised tray, it’s often best to be cautious and dispose of the affected crop promptly.
This precautionary measure prevents fungi from spreading to neighboring trays and protects the overall health of your microgreens cultivation environment.
While it may seem tempting to try different anti-fungal treatments in the hope of saving the tray, you need to consider the potential advantages compared to the risks. Microgreens are delicate and sensitive plants, and using chemicals or treatments can sometimes cause more harm than good.
Additionally, the time and effort spent trying to fight off the fungal infestation might outweigh the benefits of simply starting fresh with a new batch of seeds.
Frequently Asked Questions
Why are my microgreens growing mold?
Microgreens can grow mold due to excessive moisture, high humidity, poor ventilation and air circulation, contaminated seeds, contaminated growing media or contaminated equipment and grow trays.
What causes mold to develop on my microgreens?
Mold development is primarily caused by high humidity, overcrowding, or inadequate air circulation.
How can I prevent mold from forming on my microgreens?
Prevent mold by ensuring proper drainage, adequate air circulation, and maintaining ideal humidity levels.
Are there specific types of microgreens that are more prone to mold?
Some microgreens, like basil and cilantro, are more susceptible to mold due to their moisture requirements.
Can I still eat microgreens that have mold on them?
It’s best to discard microgreens with mold, as some molds can be harmful if ingested.
What are the signs of mold on microgreens?
Signs include white fuzzy, discolored growth, a musty odor, and a slimy texture.
Is it safe to eat microgreens with white mold?
It’s generally not safe to consume microgreens with any type of mold, including white mold.
Conclusion!
Now that you’ve learned what causes microgreen mold and how to prevent it, it’s time for the hard part… doing it! You can totally do this! Have fun, experiment with the process, and learn as you go, it’s an incredibly rewarding journey growing microgreens. To get you started check out some microgreen types you can grow today.
If you get stuck, or can’t figure out why your microgreens are not growing feel free to write your issue in the comments below, or, join my Mirogreen Silo Green Thumb Tavern group and discuss your growing woes there, see you there!
And remember, Keep Your Hands In The Dirt! ![]()

Comments (8)
I have been battling the white web mold. It started infecting my cilantro and then spread to other varieties. It usually starts during germination.
I decided to throw everything out and deep clean and set off some greenhouse bombs to get into areas that I can’t reach. I’ve reseeded and guess what? It’s still infecting my cilantro. I’ve now ditched the soil and bought a new batch of cilantro seeds. My temps are at 74F and humidity is at 43-47%. I read that you keep your humidity lower. I’ll try that but feel with the fans circulating that it tends to dry out my trays edges during germination and then seeds won’t sprout.
I’m sorry to hear about your struggle with mold. It’s frustrating to deal with. Lowering humidity can definitely help combat the mold, and drying out the trays during germination is okay as long as the microgreens aren’t left too long to dry, I water almost all my crops twice daily, once in the morning and once in the evening. Good air circulation is crucial here, so adjust your fans to prevent excessive drying while still promoting airflow. Keep experimenting with different techniques, and don’t hesitate to reach out for more advice. Good luck!
My arugula always grows fungus! This is very good information and thank you so much for your help!
You’re very welcome! I’m glad to hear that you found the information helpful. Dealing with fungus on arugula can be a common challenge, but with the right care and precautions, you can enjoy healthy and delicious arugula all year round! If you have any more questions or need further assistance, feel free to ask. Happy gardening!
Very good information
Glad you enjoyed it, and found it helpful.
Great info, I learned a lot about mold & fungus! Thanks!!
Appreciate your feedback! It’s great to know that you found my blog post about preventing mold and fungus in microgreens helpful❤️. If you ever have any more questions or need additional information, please don’t hesitate to reach out. All the best in your microgreen growing journey!